We have updated our event registration process!
Once you fill in your details on the event webpage, you will receive a confirmation email with the Zoom access link for virtual events. You no longer need to re-enter your name and email in Zoom. Use the link provided in the email to join the event.
Since Zoom registration is no longer required, you won’t receive reminder emails directly from Zoom. Instead, we recommend using the “Add to Calendar” function to save the event in your personal calendar.
This feature can be used for both single and series events, whether virtual or in-person.
Please note: If you’re using the iCalendar option, you will need to manually add each event in the series. Google Calendar and Outlook allow you to set the event as recurring.
Guide to using the “Add to Calendar” Feature:
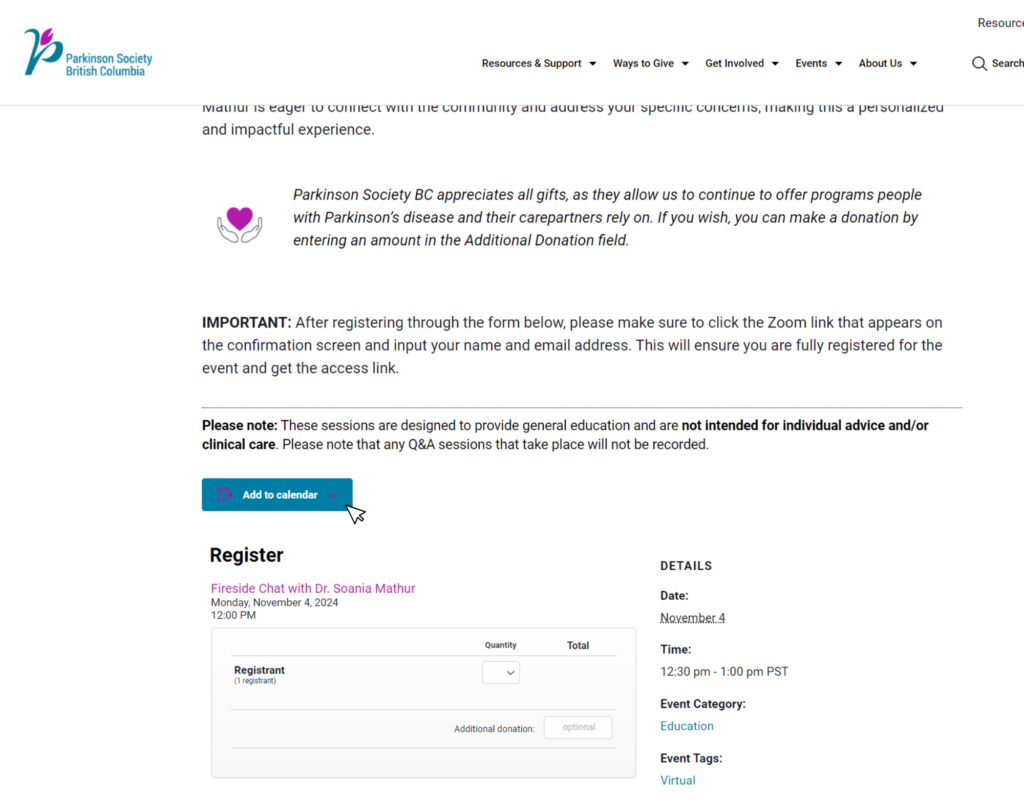
Step 1: On the event page, find and click the “Add to Calendar” button.
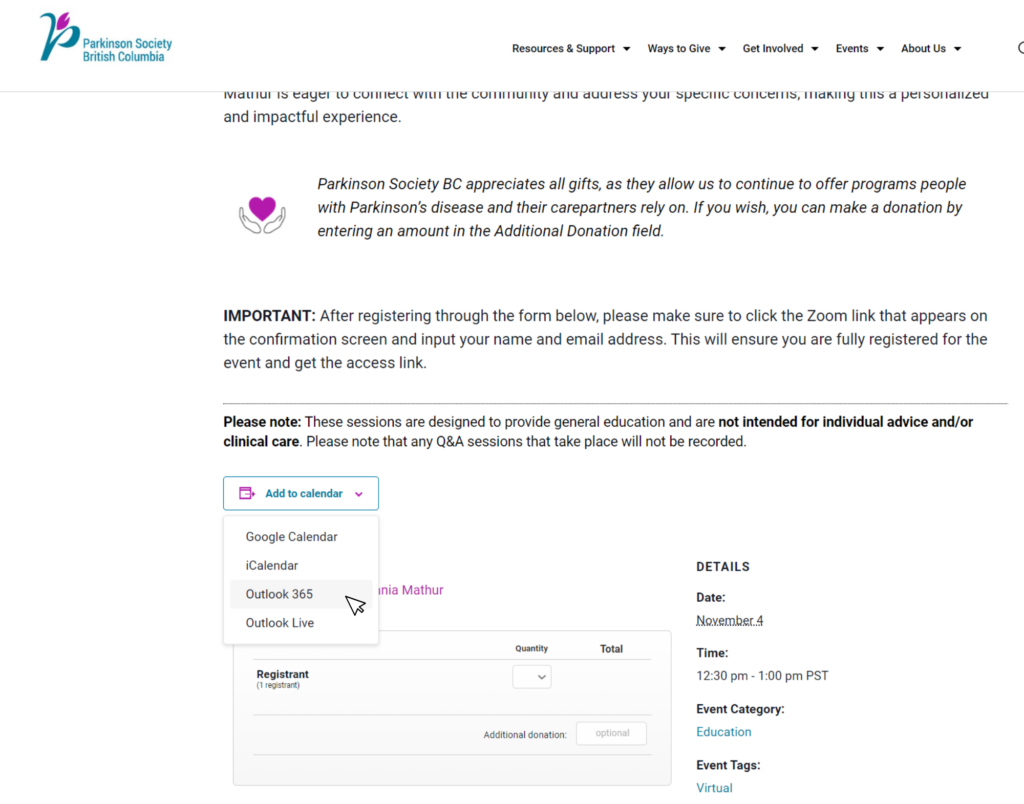
Step 2: Choose your preferred calendar option based on your email or device:
- Outlook 365/Outlook Live: Choose this option if you use Microsoft Outlook.
- Google Calendar: Select this if you have a Gmail account. This will open Google Calendar.
- iCalendar: Use this if you’re on an iOS device (iPhone, iPad, Mac). This will open your Calendar app on your Apple device.
Step 3: After selecting your calendar, a new window or the application will open, displaying the event details.
Note: You may need to sign in before the webpage or application opens.
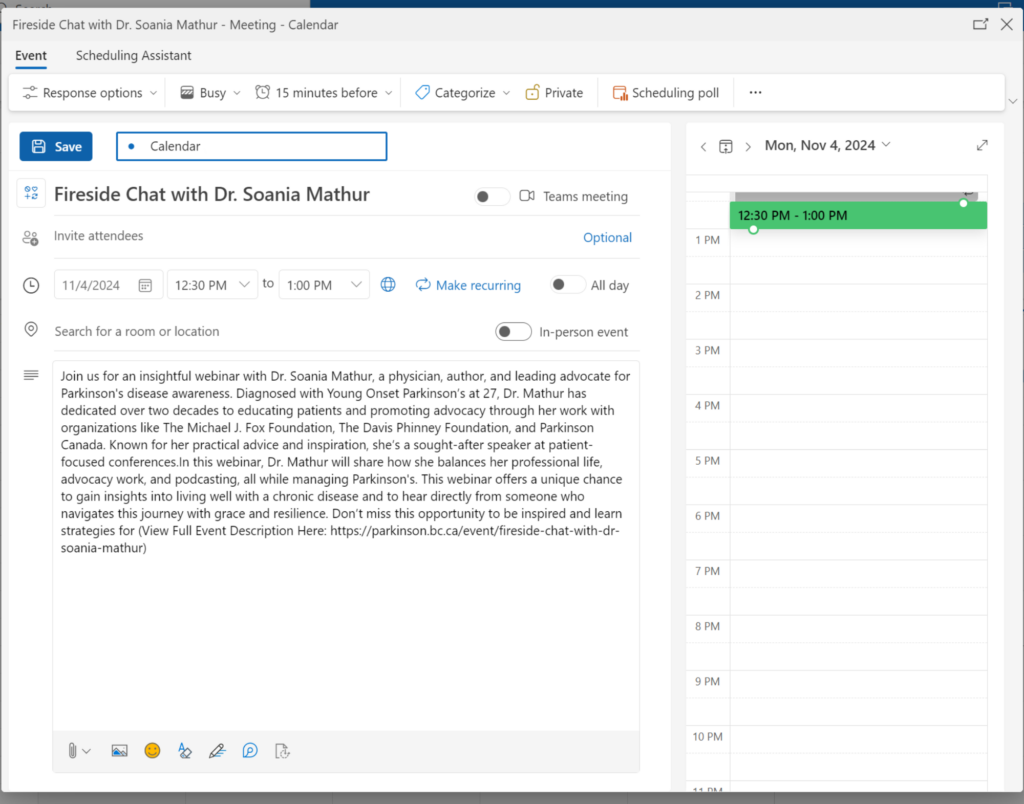
- Outlook: If you select Outlook 365 or Outlook Live, the event will open in the Outlook app or web version.
- To add recurring events for a series, click “Make Recurring.”
- If you’d like to be notified about your event, click the clock icon in the toolbar and choose how far in advance you want to be notified.
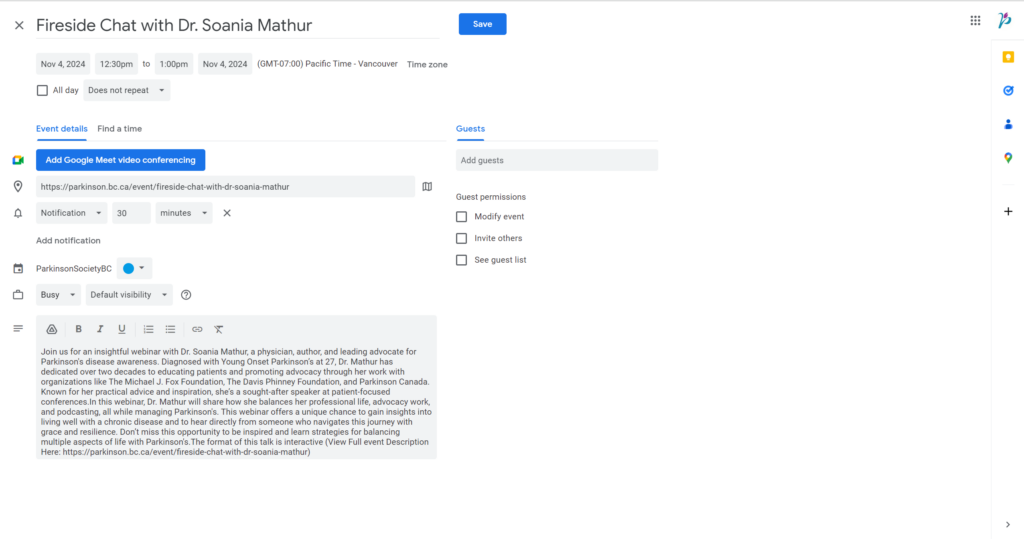
- Google Calendar: If you select Google Calendar, the event will open in your Google Calendar application or web version.
- You can click the “Does Not Repeat” option and adjust the frequency to make the event recurring if it’s part of a series.
- By default, Google Calendar sets notifications for 30 minutes before the event. You can adjust this by clicking “30” and “minutes” and selecting your preferred time.
- iCalendar: If you selected iCalendar, a pop-up will appear asking permission to open the Calendar app. Click “Open Calendar.”
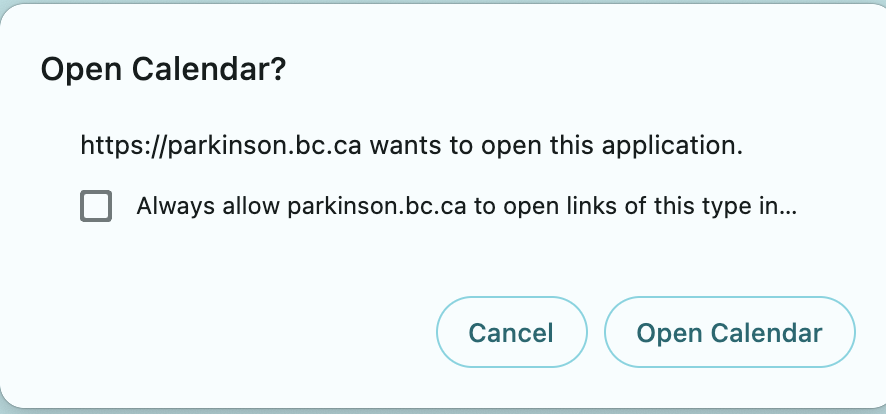
- Another pop-up with the Calendar URL will appear, giving you options to Cancel or Subscribe. Choose “Subscribe.”

- A final pop-up titled “Parkinson Society British Columbia Info” will show the event details. Follow the prompt to complete the subscription.
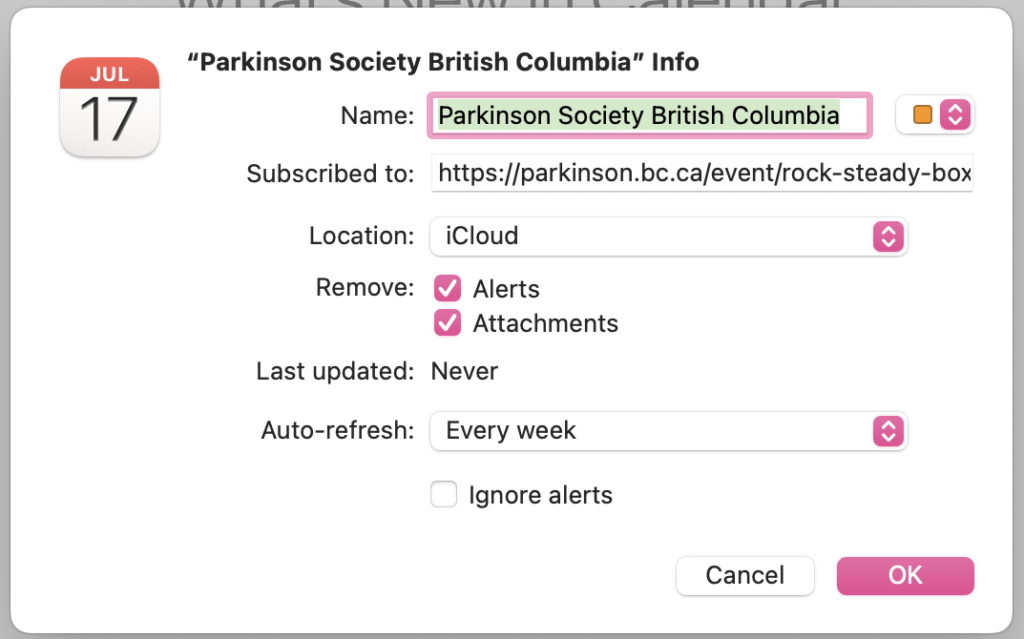
Step 4: Once you’ve reviewed the details, click “Save” (on Google Calendar and Outlook) or “OK” (on iCalendar). The event will now appear in your calendar.
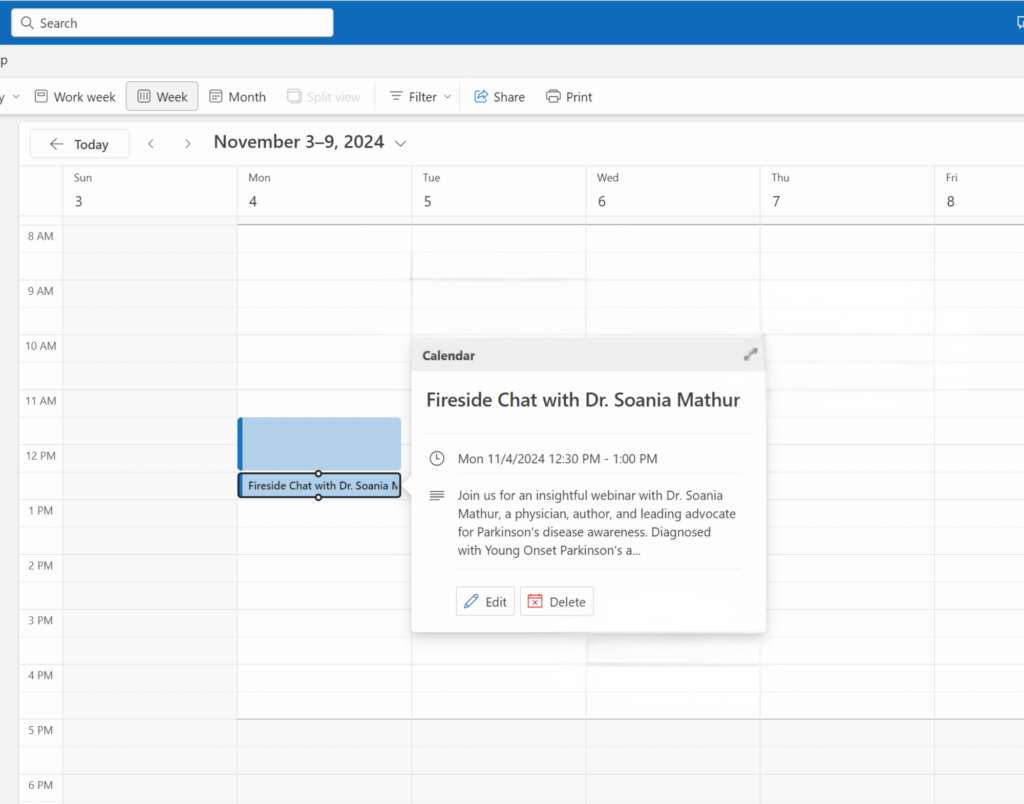
By following these steps, you can keep track of all your upcoming classes and events! If you have any questions, feel free to reach out to us for assistance.
